Are you looking to optimize your financial management in QuickBooks Online? The Chart of Accounts is your key to success. This comprehensive guide will walk you through everything you need to know about the Chart of Accounts in QuickBooks Online. From basic setup to advanced customization, we've got you covered.
Understanding the Chart of Accounts
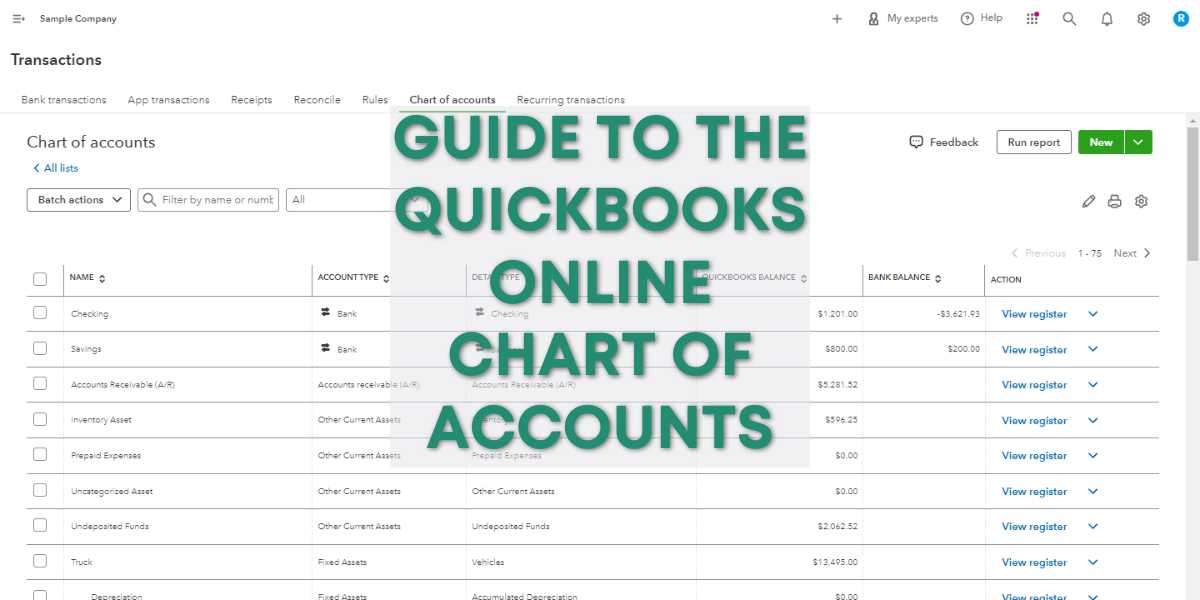
The Chart of Accounts is the foundation of your financial records in QuickBooks Online. It organizes your finances into categories, making it easier to track and report. Think of it as a filing system for your business transactions. Each account represents a specific type of asset, liability, income, or expense.
Moreover, a well-structured Chart of Accounts provides a clear financial picture of your business. It helps you generate accurate financial statements and make informed business decisions. Understanding your Chart of Accounts is crucial for effective financial management.
Accessing the Chart of Accounts in QuickBooks Online
QuickBooks Online makes it easy to access your Chart of Accounts. Follow these simple steps:
- Log in to your QuickBooks Online account.
- Click on the "Accounting" tab in the left-hand menu.
- Select "Chart of Accounts" from the dropdown menu.
Alternatively, you can use the search bar at the top of the screen. Just type "Chart of Accounts" and select it from the search results. Remember, quick access to your Chart of Accounts is essential for efficient bookkeeping.
Default Account Types in QuickBooks Online
QuickBooks Online provides several default account types to help you get started. These include:
- Assets: Things your business owns, like cash and inventory.
- Liabilities: Debts your business owes, such as loans or accounts payable.
- Income: Money your business earns from sales or services.
- Expenses: Costs your business incurs, like rent or utilities.
- Equity: The owner's stake in the business.
Understanding these account types helps you categorize your financial transactions correctly. QuickBooks Online uses these categories to generate accurate financial reports for your business.
Setting Up Your Chart of Accounts
Setting up your Chart of Accounts is a crucial step in QuickBooks Online. Here's how to get started:
- Go to the Chart of Accounts page.
- Review the default accounts provided by QuickBooks Online.
- Identify any additional accounts your business needs.
- Plan your account structure, considering your business's specific financial needs.
- Decide on a numbering system for your accounts, if desired.
Remember, a well-planned Chart of Accounts sets the stage for efficient financial management. Take your time to create a structure that works best for your business.
Customizing Account Names and Numbers
QuickBooks Online allows you to customize account names and numbers. To do this:
- Go to your Chart of Accounts.
- Click on the account you want to customize.
- Select "Edit" from the "Action" column.
- Change the account name or number as desired.
- Click "Save and Close" to apply your changes.
Customizing account names and numbers can make your Chart of Accounts more intuitive. However, ensure your customizations still align with standard accounting practices for consistency.
Adding New Accounts
As your business grows, you may need to add new accounts. Here's how:
- On the Chart of Accounts page, click "New" in the top right corner.
- Choose the account type (e.g., Income, Expense, Asset).
- Select a detail type that best describes the account.
- Enter a name for the account.
- (Optional) Add an account number.
- Click "Save and Close" to create the new account.
Adding relevant accounts helps you track your finances more accurately. However, avoid creating unnecessary accounts that may complicate your bookkeeping.
Editing Existing Accounts
Sometimes, you may need to modify existing accounts. To edit an account:
- Find the account you want to edit in your Chart of Accounts.
- Click on the account name.
- Select "Edit" from the "Action" column.
- Make the necessary changes to the account details.
- Click "Save and Close" to apply your edits.
Regularly reviewing and updating your accounts ensures your Chart of Accounts remains relevant. Remember to consider how changes might affect your financial reporting before making edits.
Deleting or Inactivating Accounts
When an account is no longer needed, you can delete or inactivate it. Here's how:
- Locate the account in your Chart of Accounts.
- Click on the account name.
- Select "Delete" or "Make inactive" from the "Action" column.
- Confirm your choice in the pop-up window.
Deleting permanently removes the account, while inactivating hides it from view. Choose wisely based on your future needs and accounting requirements.
Organizing Your Chart of Accounts
A well-organized Chart of Accounts improves financial clarity. Consider these tips:
- Group similar accounts together.
- Use a consistent naming convention for your accounts.
- Implement a logical numbering system, if desired.
- Keep your list of accounts concise and relevant.
- Regularly review and update your Chart of Accounts.
An organized Chart of Accounts makes it easier to find information and generate reports. It also helps prevent errors in transaction categorization.
Using Sub-accounts for Better Organization
Sub-accounts can further organize your Chart of Accounts. To create a sub-account:
- Click "New" to add a new account.
- Fill in the account details as usual.
- Check the "Is sub-account" box.
- Select the parent account from the dropdown menu.
- Click "Save and Close" to create the sub-account.
Sub-accounts allow for more detailed tracking within broader categories. They're particularly useful for businesses with complex financial structures.
Importing and Exporting the Chart of Accounts
QuickBooks Online allows you to import and export your Chart of Accounts. To import:
- Go to the Chart of Accounts page.
- Click the "New" button and select "Import".
- Choose your file and map the columns.
- Review and confirm the import.
To export:
- Go to the Chart of Accounts page.
- Click the "Run Report" button.
- Click the "Export" button and choose your preferred format.
These features are useful for bulk updates or when switching from another accounting system.
Reconciling Accounts in the Chart of Accounts
Regular account reconciliation is crucial for accurate financial records. To reconcile an account:
- Go to the "Accounting" menu and select "Reconcile".
- Choose the account you want to reconcile.
- Enter the ending balance and statement date.
- Match transactions in QuickBooks to your statement.
- Click "Finish now" when the difference is zero.
Reconciling ensures your QuickBooks records match your real-world financial statements. It helps catch errors and discrepancies early.
Generating Reports Using the Chart of Accounts
Your Chart of Accounts is key to generating accurate financial reports. Common reports include:
- Balance Sheet: Shows your assets, liabilities, and equity.
- Profit and Loss: Displays your income and expenses.
- Statement of Cash Flows: Illustrates your cash inflows and outflows.
To generate these reports:
- Go to the "Reports" menu.
- Select the report you want to run.
- Customize the date range and other parameters as needed.
- Click "Run Report" to generate.
These reports provide valuable insights into your business's financial health.
Best Practices for Managing Your Chart of Accounts
Follow these best practices to maintain an effective Chart of Accounts:
- Keep it simple: Only create accounts you truly need.
- Be consistent: Use standardized naming conventions and account types.
- Review regularly: Update your Chart of Accounts as your business evolves.
- Use descriptive names: Make account purposes clear at a glance.
- Align with tax requirements: Ensure your accounts facilitate easy tax reporting.
- Limit access: Only allow authorized personnel to modify the Chart of Accounts.
- Document changes: Keep a record of any significant changes made.
These practices will help you maintain an accurate and useful Chart of Accounts.
Troubleshooting Common Chart of Accounts Issues
Even with careful management, issues can arise. Here are some common problems and solutions:
- Duplicate accounts: Regularly review and merge duplicate accounts.
- Incorrectly categorized transactions: Double-check and reassign transactions as needed.
- Overly complex structure: Simplify your Chart of Accounts by consolidating similar accounts.
- Inconsistent naming: Implement a standardized naming convention across all accounts.
- Outdated accounts: Regularly review and inactivate accounts that are no longer used.
Addressing these issues promptly will help maintain the accuracy of your financial records.
Advanced Features and Customizations
QuickBooks Online offers several advanced features for your Chart of Accounts:
- Class tracking: Categorize income and expenses across accounts.
- Location tracking: Monitor finances for multiple business locations.
- Custom fields: Add unique identifiers to transactions.
- Bank rules: Automate transaction categorization based on set criteria.
- Budgeting: Create budgets based on your Chart of Accounts structure.
These features can enhance your financial tracking and reporting capabilities.
Integrating the Chart of Accounts with Other QuickBooks Features
Your Chart of Accounts integrates with various QuickBooks Online features:
- Invoicing: Automatically updates relevant accounts when creating invoices.
- Expense tracking: Categorizes expenses based on your Chart of Accounts.
- Payroll: Reflects employee payments in the appropriate accounts.
- Inventory management: Tracks inventory value changes in asset accounts.
- Project profitability: Allows income and expense tracking per project.
These integrations streamline your accounting processes and ensure data consistency across features.
Conclusion
Mastering the Chart of Accounts in QuickBooks Online is crucial for effective financial management. A well-structured Chart of Accounts provides clear insights into your business's financial health. It facilitates accurate reporting, simplifies tax preparation, and aids in informed decision-making.
Remember to regularly review and update your Chart of Accounts as your business evolves. Use the advanced features and integrations QuickBooks Online offers to streamline your accounting processes. With these tools and best practices, you'll be well-equipped to manage your business finances effectively.
By implementing the strategies outlined in this guide, you'll optimize your financial tracking and reporting. You'll gain a deeper understanding of your business's financial position and performance. The Chart of Accounts is more than just a list of categories. It's a powerful tool for financial clarity and business success.